


You’ve taken the screenshot. Now you need to attach it, paste it into a conversation, or check a detail. Here’s how to find it without opening every folder on your Mac.
Start with your Desktop
Look for a file named “Screenshot” or “Screen Shot,” followed by a date and time. The wording can vary with your Mac’s language settings.
If a small thumbnail is still visible in the corner of your screen, give it a moment. You can also drag that thumbnail straight into the document or conversation where you need it. Apple explains these options in its screenshot guide.
Check where your Mac saves screenshots
The Screenshot app lets you choose a destination. If you’ve changed it before, your screenshots may be going somewhere other than the Desktop.
- Press Shift + Command + 5 to open the screenshot toolbar.
- Click Options.
- Under Save to, check the selected destination.
- If it’s a folder, open that folder in Finder and look for your capture.
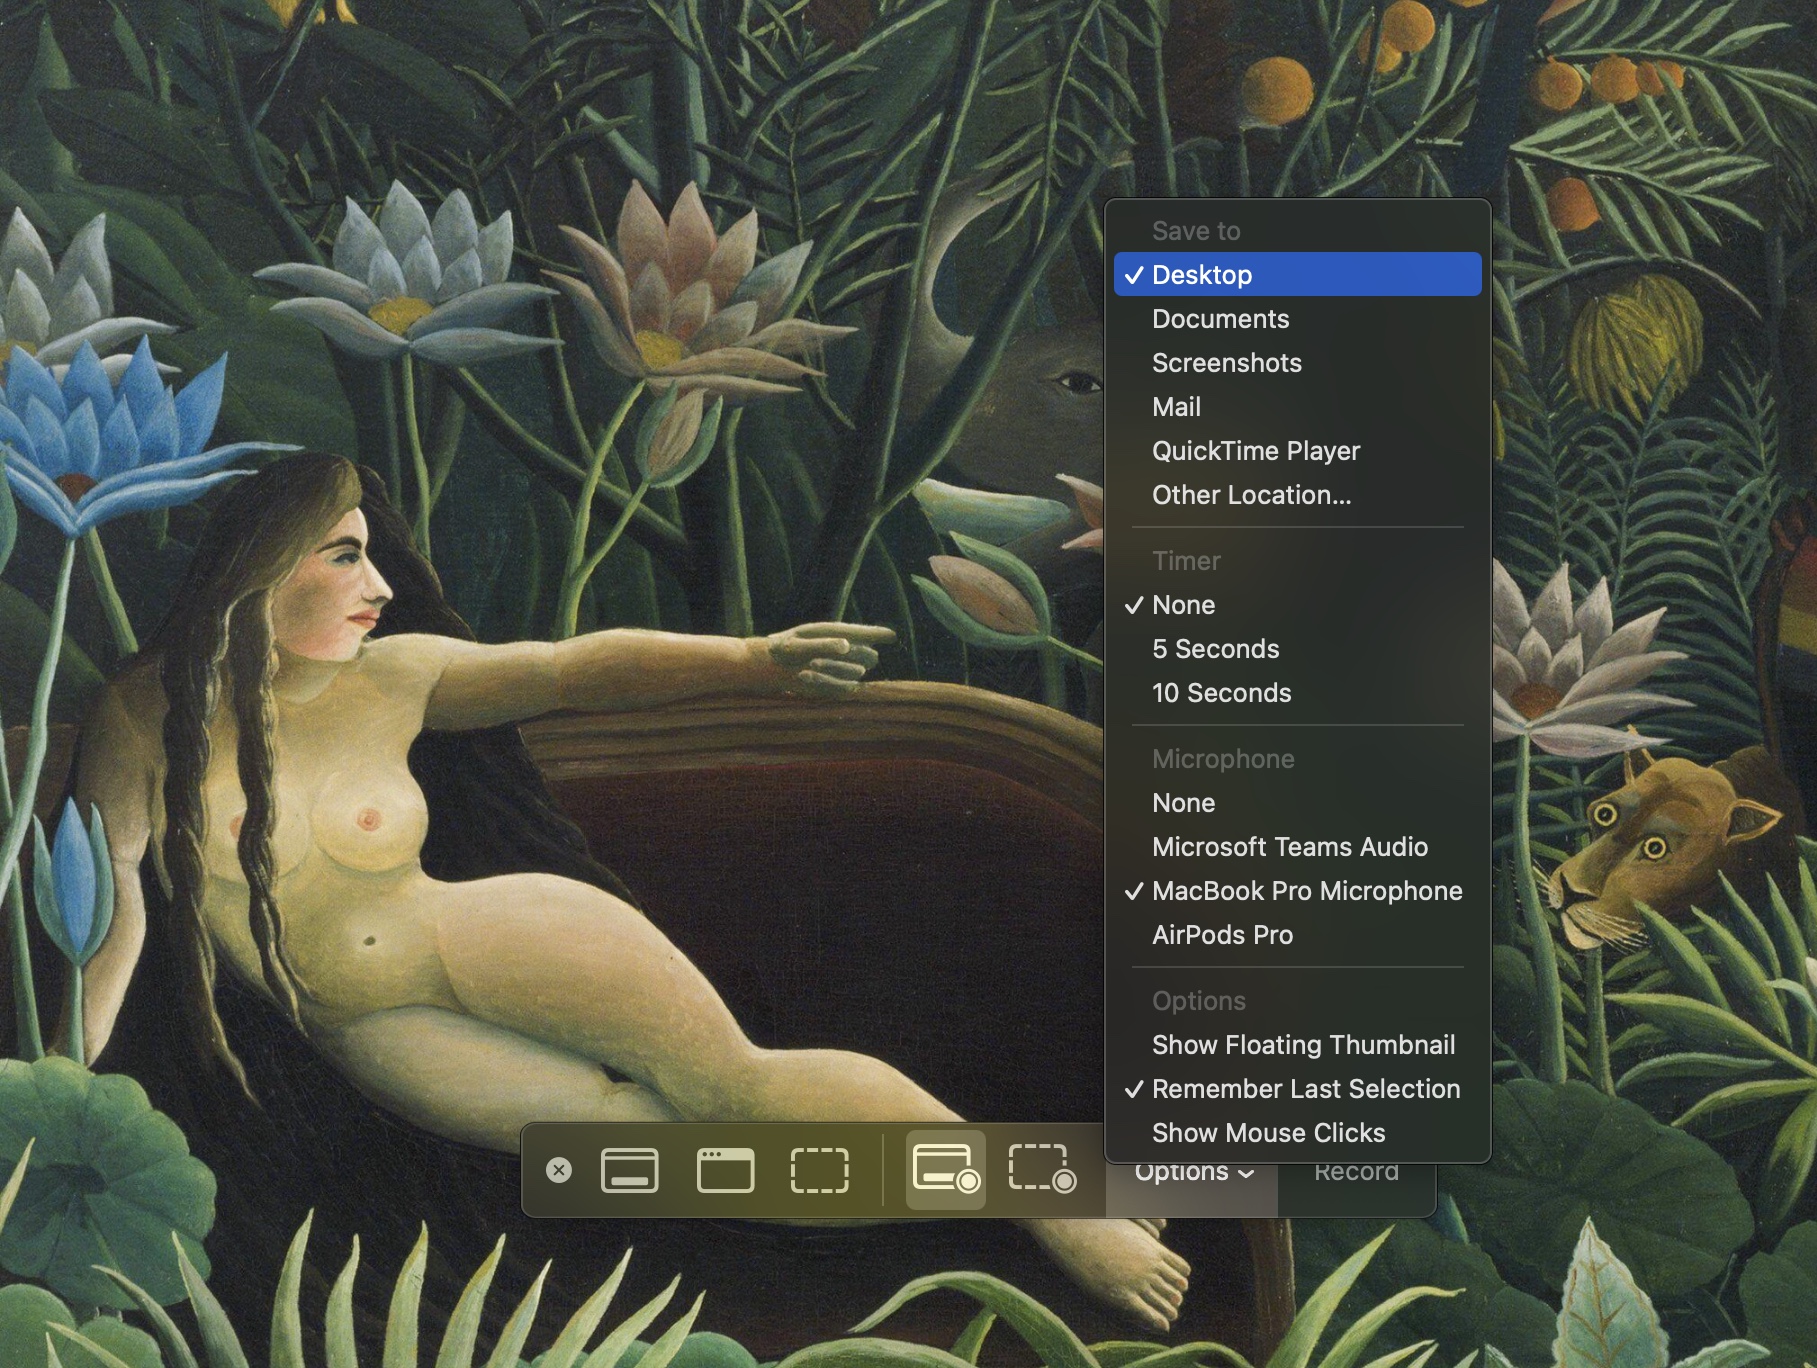
To choose a different folder for future screenshots, use Other Location in the same menu. You can close the toolbar without taking another screenshot.
This check is useful before you spend time searching: it tells you where to look next. See Apple’s guide to Screenshot options for the available controls.
Did the screenshot go to your clipboard?
Holding Control along with a screenshot shortcut copies the image to the clipboard instead of saving a file. For example, Control + Shift + Command + 4 copies a selected area.
Try Command + V in an app or document that accepts images. If it pastes, you have the screenshot — it simply wasn’t saved as a Desktop file. You can also choose Clipboard as the destination in the Screenshot toolbar.
Apple documents the clipboard shortcut alongside its other capture methods.
Find an older screenshot in Finder
If you don’t know where an older capture went, try searching in Finder:
- Open Finder and enter Screenshot in the search field. Try Screen Shot too, or the equivalent in your Mac’s language.
- Choose This Mac to broaden the search beyond the current folder.
- Use the + button to add a Kind → Image filter if the results are too broad.
- Add a date criterion if you remember when you captured it.
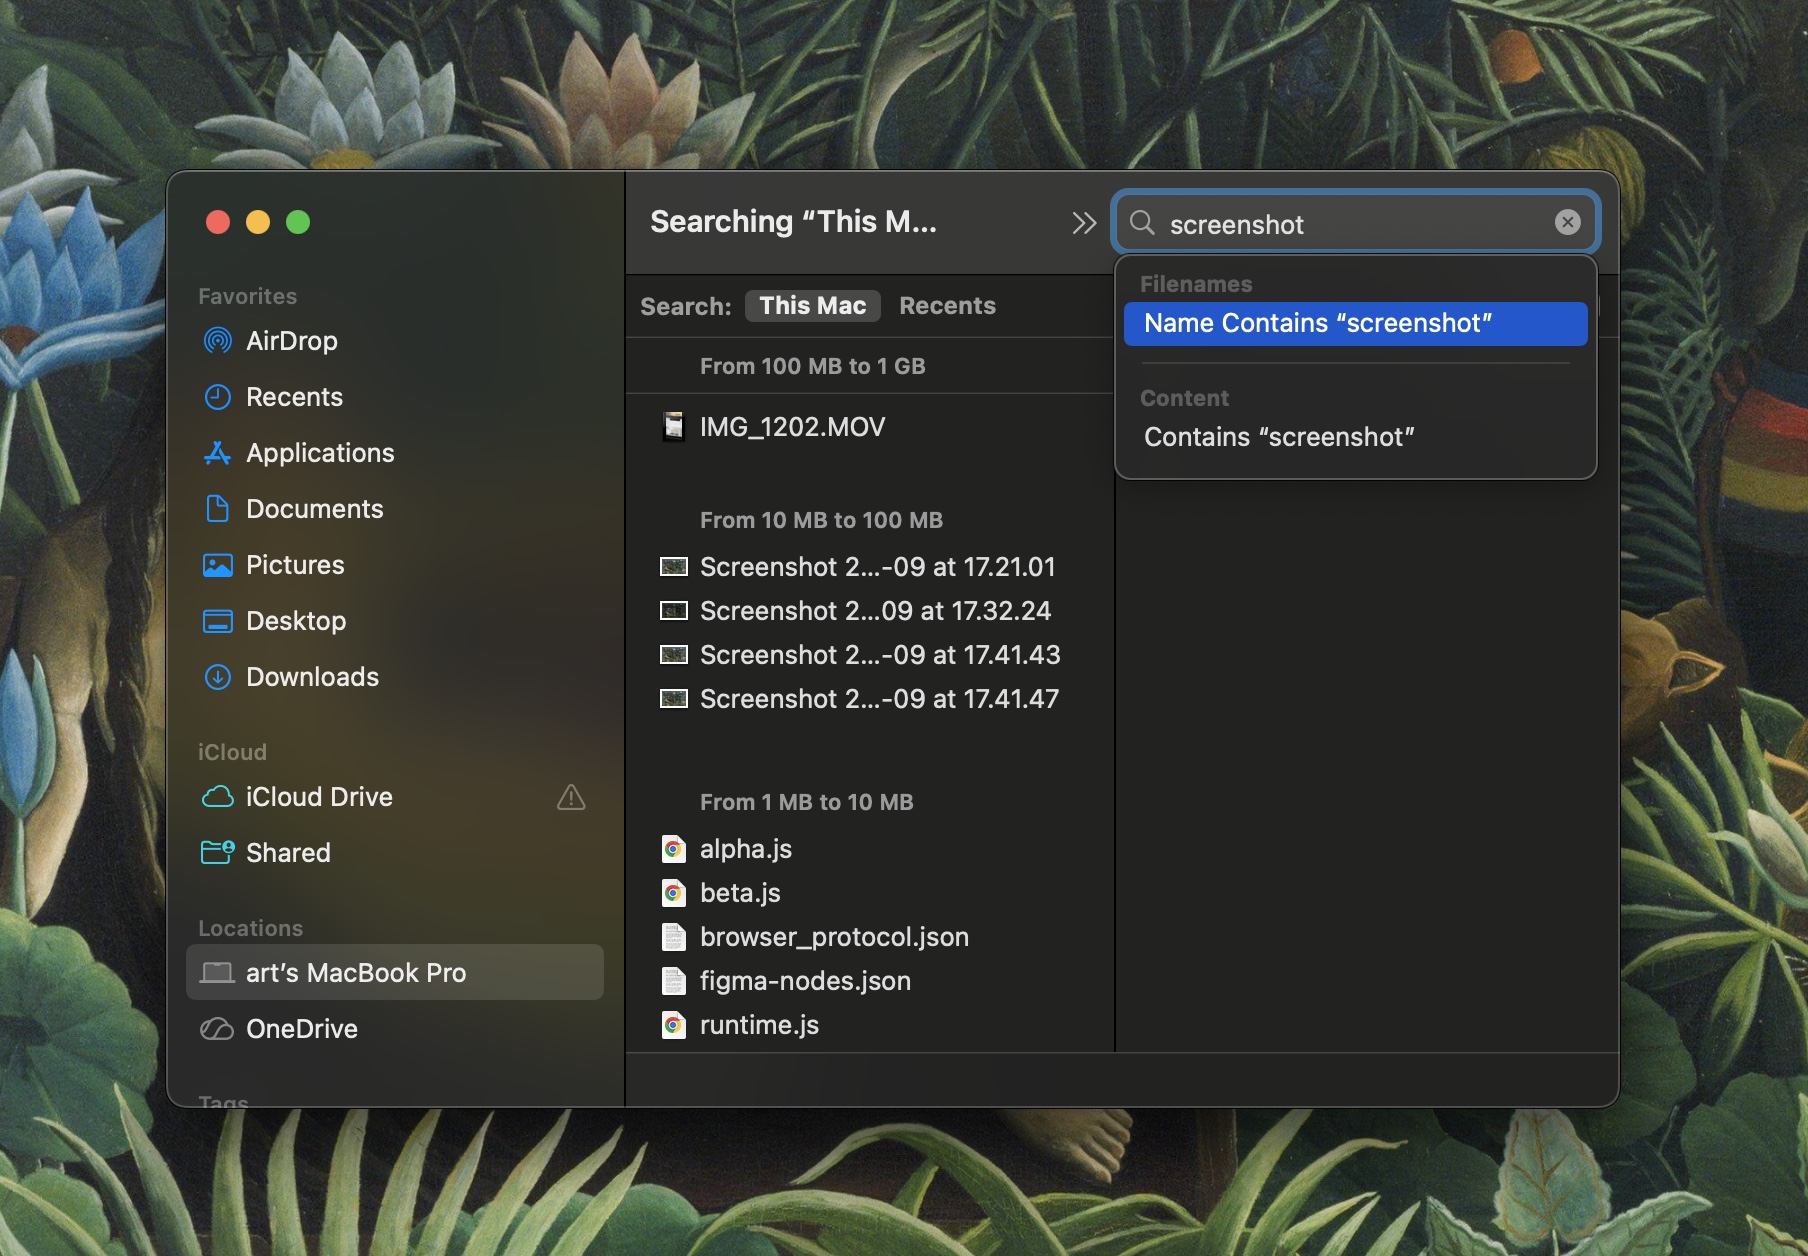
A renamed screenshot won’t necessarily match those words. In that case, search for part of its new name, or narrow the results by image type and date. Apple’s Finder search guide explains how these filters work.
When you find a likely match, select it and press Space. Quick Look opens a larger preview so you can check the contents without opening the image in an editor. Press Space again to close it. This is handy when several captures have similar names and the small thumbnails aren’t enough to tell them apart.
Keep the next screenshot close
Finding a file is one thing. Reaching for it several times while you work is another.
Archie keeps screenshots from your chosen screenshots folder within reach in a panel at the top of your Mac. Open the panel at the notch, find the capture you need, and drag it into an app that accepts files.
The folder is still where the files live. Archie gives you a convenient place to reach them while you work, so your next screenshot is close when you need it.